Thursday, August 13, 2015

List View with Maps V2 Version

Main Activity:

package com.example.mymap;

import java.util.ArrayList;
import java.util.HashMap;

import android.content.Intent;
import android.os.Bundle;
import android.support.v4.app.FragmentActivity;
import android.view.View;
import android.widget.AdapterView;
import android.widget.AdapterView.OnItemClickListener;
import android.widget.ListAdapter;
import android.widget.ListView;
import android.widget.SimpleAdapter;

public class MainActivity extends FragmentActivity {

ArrayList<HashMap<String, String>> dataList = new ArrayList<HashMap<String,String>>();
ListView list;
@Override
protected void onCreate(Bundle savedInstanceState) {
super.onCreate(savedInstanceState);
setContentView(R.layout.activity_main);
list=(ListView)findViewById(R.id.listView1);

HashMap<String, String> map=new HashMap<String, String>();
map.put("cityName", "XYZ");
map.put("lat", "17.363848900000000000");
map.put("longi", "78.534850699999990000");
dataList.add(map);

HashMap<String, String> map1=new HashMap<String, String>();
map1.put("cityName", "YXZ");
map1.put("lat", "17.374445000000000000");
map1.put("longi", "78.505896000000000000");
dataList.add(map1);

HashMap<String, String> map2=new HashMap<String, String>();
map2.put("cityName", "ZXY");
map2.put("lat", "17.382042000000000000");
map2.put("longi", "78.481727299999990000");
dataList.add(map2);


ListAdapter adapter = new SimpleAdapter(
                 MainActivity.this, dataList,
                 R.layout.mycustom_layout, new String[] { "cityName", "lat",
                "longi" }, new int[] { R.id.name,
                         R.id.email, R.id.mobile });

         list.setAdapter(adapter);
       
         list.setOnItemClickListener(new OnItemClickListener() {

             @Override
             public void onItemClick(AdapterView<?> parent, View view,
                     final int position, long id) {
            HashMap<String, String> map2= dataList.get(position);
            String city=map2.get("cityName");
            String lat=map2.get("lat");
            String longo=map2.get("longi");
            // Starting single contact activity
                 Intent in = new Intent(getApplicationContext(), SingleContactActivity.class);
                 in.putExtra("cityName", city);
                 in.putExtra("lat", lat);
                 in.putExtra("longi", longo);
                 startActivity(in);
             }
         });
}


}


SingleContactActivity:


package com.example.mymap;

import android.content.Intent;
import android.os.Bundle;
import android.support.v4.app.FragmentActivity;
import android.util.Log;
import android.view.View;
import android.view.View.OnClickListener;
import android.widget.ArrayAdapter;
import android.widget.Button;
import android.widget.Spinner;
import android.widget.Toast;

import com.google.android.gms.common.ConnectionResult;
import com.google.android.gms.common.GooglePlayServicesUtil;
import com.google.android.gms.maps.CameraUpdate;
import com.google.android.gms.maps.CameraUpdateFactory;
import com.google.android.gms.maps.GoogleMap;
import com.google.android.gms.maps.GoogleMap.OnInfoWindowClickListener;
import com.google.android.gms.maps.SupportMapFragment;
import com.google.android.gms.maps.model.BitmapDescriptorFactory;
import com.google.android.gms.maps.model.LatLng;
import com.google.android.gms.maps.model.Marker;
import com.google.android.gms.maps.model.MarkerOptions;


public class SingleContactActivity extends FragmentActivity{

    @Override
    protected void onCreate(Bundle savedInstanceState) {
        super.onCreate(savedInstanceState);
        setContentView(R.layout.activity_map);

        // getting intent data
        Intent in = getIntent();
       
        // Get JSON values from previous intent
        String name = in.getStringExtra("cityName");

       
        // Receiving latitude from MainActivity screen
        double latitude = getIntent().getDoubleExtra("lat", 0);

        // Receiving longitude from MainActivity screen
        double longitude = getIntent().getDoubleExtra("longi", 0);

        LatLng position = new LatLng(latitude, longitude);

        // Instantiating MarkerOptions class
     

        // Getting Reference to SupportMapFragment of activity_map.xml
        SupportMapFragment fm = (SupportMapFragment)getSupportFragmentManager().findFragmentById(R.id.map);

        // Getting reference to google map
        GoogleMap googleMap = fm.getMap();
        MarkerOptions options = new MarkerOptions();
       
        // Setting position for the MarkerOptions
        options.position(position);

        // Setting title for the MarkerOptions
        options.title(name);

        // Setting snippet for the MarkerOptions
        options.snippet("Latitude:"+latitude+",Longitude:"+longitude);
        // Adding Marker on the Google Map
        googleMap.addMarker(options);

        // Creating CameraUpdate object for position
        CameraUpdate updatePosition = CameraUpdateFactory.newLatLng(position);

        // Creating CameraUpdate object for zoom
        CameraUpdate updateZoom = CameraUpdateFactory.zoomBy(4);

        // Updating the camera position to the user input latitude and longitude
        googleMap.moveCamera(updatePosition);

        // Applying zoom to the marker position
        googleMap.animateCamera(updateZoom);
    }


}


activity_main:


<RelativeLayout xmlns:android="http://schemas.android.com/apk/res/android"
    xmlns:tools="http://schemas.android.com/tools"
    android:layout_width="match_parent"
    android:layout_height="match_parent"
    tools:context="${relativePackage}.${activityClass}" >

    
    <ListView
        android:id="@+id/listView1"
        android:layout_width="match_parent"
        android:layout_height="wrap_content"
       />
   

</RelativeLayout>


activity_map:

<?xml version="1.0" encoding="utf-8"?>
<LinearLayout xmlns:android="http://schemas.android.com/apk/res/android"
    xmlns:tools="http://schemas.android.com/tools"
    android:layout_width="match_parent"
    android:layout_height="match_parent"
    android:orientation="vertical" >

    <TextView
        android:id="@+id/textView1"
        android:layout_width="wrap_content"
        android:layout_height="wrap_content"
        android:text="Google Places" />

    <fragment
        android:id="@+id/map"
        android:name="com.google.android.gms.maps.SupportMapFragment"
        android:layout_width="match_parent"
        android:layout_height="match_parent" />

</LinearLayout>


custom_layout


<?xml version="1.0" encoding="utf-8"?>
<LinearLayout xmlns:android="http://schemas.android.com/apk/res/android"
    android:layout_width="fill_parent"
    android:layout_height="wrap_content"
    android:orientation="vertical"
    android:padding="10dp"
    android:paddingLeft="10dp"
    android:paddingRight="10dp" >
 
    <!-- Name Label -->
 
    <TextView
        android:id="@+id/name"
        android:layout_width="fill_parent"
        android:layout_height="wrap_content"
        android:paddingBottom="2dip"
        android:paddingTop="6dip"
        android:textColor="#43bd00"
        android:textSize="16sp"
        android:textStyle="bold" />
 
    <!-- Email label -->
    <TextView
        android:id="@+id/email"
        android:layout_width="fill_parent"
        android:layout_height="wrap_content"
        android:paddingBottom="2dip"
        android:textColor="#acacac" />
 
    <!-- Mobile number label -->
    <TextView
        android:id="@+id/mobile"
        android:layout_width="wrap_content"
        android:layout_height="wrap_content"
        android:gravity="left"
        android:text="Mobile: "
        android:textColor="#5d5d5d"
        android:textStyle="bold" />
 
</LinearLayout>


Manifest file:

<?xml version="1.0" encoding="utf-8"?>
<manifest xmlns:android="http://schemas.android.com/apk/res/android"
    package="com.example.mymap"
    android:versionCode="1"
    android:versionName="1.0" >

    <uses-sdk
        android:minSdkVersion="8"
        android:targetSdkVersion="19" />

    <uses-permission android:name="android.permission.INTERNET" />

    <permission
        android:name="com.example.mymap.permission.MAPS_RECEIVE"
        android:protectionLevel="signature" />

    <uses-permission android:name="com.example.mymap.permission.MAPS_RECEIVE" />
    <uses-permission android:name="android.permission.ACCESS_NETWORK_STATE" />
    <uses-permission android:name="android.permission.WRITE_EXTERNAL_STORAGE" />
    <uses-permission android:name="com.google.android.providers.gsf.permission.READ_GSERVICES" />
    <uses-permission android:name="android.permission.ACCESS_COARSE_LOCATION" />
    <uses-permission android:name="android.permission.ACCESS_FINE_LOCATION" />

    <uses-feature
        android:glEsVersion="0x00020000"
        android:required="true" />

    <application
        android:allowBackup="true"
        android:icon="@drawable/ic_launcher"
        android:label="@string/app_name"
        android:theme="@style/AppTheme" >
        <meta-data
            android:name="com.google.android.maps.v2.API_KEY"
            android:value="Here Your Google Map Key" />
        <meta-data
            android:name="com.google.android.gms.version"
            android:value="@integer/google_play_services_version" />

        <activity
            android:name=".MainActivity"
            android:label="@string/app_name" >
            <intent-filter>
                <action android:name="android.intent.action.MAIN" />

                <category android:name="android.intent.category.LAUNCHER" />
            </intent-filter>
        </activity>
        <activity
            android:name="com.example.mymap.SingleContactActivity"
            android:label="@string/app_name" >
        </activity>
    </application>

</manifest>

Saturday, September 13, 2014

Remote service Tutorial


Remote Service Tutorial

Services typically are required to run for a long time and hence should run in their own thread. Such services can be invoked by any number of clients who want to connect to the service, invoke a few methods on the service and finally release the service, probably to serve more clients or close down.

Here, I would like to introduce you to the concept of connecting to a remote service and the kind of support provided by the android platform for the same.

You can see this to understand how Local services can be created and used. The difference between the two mainly is that the local service runs in the same process as the application that started it and hence the life of the local service is dependent on the life of the said application while remote service can run in its own process. This causes a challenge of inter-process communication. If one process wants to communicate with another process, the object that is passed between the two needs to be marshaled.

For this purpose, Android provides the AIDL (Android Interface Definition Language) tool that handles the marshaling as well as the communication.

The service has to declare a service interface in an aidl file and the AIDL tool will automatically create a java interface corresponding to the aidl file. The AIDL tool also generates a stub class that provides an abstract implementation of the service interface methods. The actual service class will have to extend this stub class to provide the real implementation of the methods exposed through the interface.

The service clients will have to invoke the onBind() method on the service to be able to connect to the service. The onBind() method returns an object of the stub class to the client. Here are the code related code snippets:

The AIDL file:
Code: 
package com.collabera.labs.sai;

interface IMyRemoteService {

   int getCounter();
}


Once you write this AIDL file (.aidl) in eclipse, it will automatically generate the Remote interface corresponding to this file. The remote interface will also provide a stub inner class which has to have an implementation provided by the RemoteService class. The stub class implementation within the service class is as given here:

Code: 
private IMyRemoteService.Stub myRemoteServiceStub = new IMyRemoteService.Stub() {
      public int getCounter() throws RemoteException {
         return counter;
      }
   };
The onBind() method in the service class:
   public IBinder onBind(Intent arg0) {
      Log.d(getClass().getSimpleName(), "onBind()");
      return myRemoteServiceStub;
   }


Now, let us quickly look at the meat of the service class before we move on to how the client connects to this service class. My RemoteService class is just incrementing a counter in a separate thread. This thread is created in the onStart() method as this gets certainly called whether the service is connected to by a call to startService(intent) or by bindService(…). Please read the lifecycle of a service if this needs more clarity. Here are the over-ridden onCreate(), onStart() and onDestroy() methods. Note that the resources are all released in the onDestroy() method.

Code: 
   public void onCreate() {
      super.onCreate();
      Log.d(getClass().getSimpleName(),"onCreate()");
   }
   public void onStart(Intent intent, int startId) {
      super.onStart(intent, startId);
      serviceHandler = new Handler();
      serviceHandler.postDelayed(myTask, 1000L);
      Log.d(getClass().getSimpleName(), "onStart()");
   }
   public void onDestroy() {
      super.onDestroy();
      serviceHandler.removeCallbacks(myTask);
      serviceHandler = null;
      Log.d(getClass().getSimpleName(),"onDestroy()");
   }


A little explanation: In the onStart() method, I created a new Handler object that will spawn out a new task that implements the Runnable interface. This thread does the job of incrementing the counter. Here is the code for the Task class – an inner class of the RemoteService class.

Code: 
class Task implements Runnable {
   public void run() {
      ++counter;
      serviceHandler.postDelayed(this,1000L);
      Log.i(getClass().getSimpleName(), "Incrementing counter in the run method");
   }
}


An object of this Task class is passed to the serviceHandler object as a message that needs to be executed after 1 second. The Task class implements the run() method in which we repeatedly post the same message to the serviceHandler. Thus, this becomes a repeated task till all the messages in the serviceHandler queue are deleted by calling the removeCallbacks() method on the serviceHandler in the destroy() method of the RemoteService class.

Note that the onDestroy() method thus stops this thread and set the serviceHandler to null. This completes the implementation of the RemoteService class. The complete code is downloadable here.
Now coming to the client class - Here, for simplicity sake, I have put the start, stop, bind, release and invoke methods all in the same client. While in reality, one client may start and another can bind to the already started service.

There are 5 buttons one each for start, stop, bind, release and invoke actions. A client needs to bind to a service before it can invoke any method on the service.

Here are the start and the bind methods.

Code: 
private void startService(){
     if (started) {
       Toast.makeText(RemoteServiceClient.this, "Service already started", Toast.LENGTH_SHORT).show();
     } else {
       Intent i = new Intent();
       i.setClassName("com.collabera.labs.sai", "com.collabera.labs.sai.RemoteService");
       startService(i);
       started = true;
       updateServiceStatus();
       Log.d( getClass().getSimpleName(), "startService()" );
      }
           
  }


An explicit intent is created and the service is started with the Context.startService(i) method.
Rest of the code is to update some status on the UI. There is nothing specific to a remote service invocation here. It is on the bindService() method that we see the difference from a local service.

Code: 
private void bindService() {
     if(conn == null) {
        conn = new RemoteServiceConnection();
        Intent i = new Intent();
        i.setClassName("com.collabera.labs.sai", "com.collabera.labs.sai.RemoteService");
        bindService(i, conn, Context.BIND_AUTO_CREATE);
        updateServiceStatus();
        Log.d( getClass().getSimpleName(), "bindService()" );
     } else {
       Toast.makeText(RemoteServiceClient.this, "Cannot bind - service already bound", Toast.LENGTH_SHORT).show();
     }
}


Here we get a connection to the remote service through the RemoteServiceConnection class which implements ServiceConnection Interface. The connection object is required by the bindService() method – an intent, connection object and the type of binding are to be specified. So, how do we create a connection to the RemoteService? Here is the implementation:

Code: 
class RemoteServiceConnection implements ServiceConnection {
      public void onServiceConnected(ComponentName className,
     IBinder boundService ) {
remoteService = IMyRemoteService.Stub.asInterface((IBinder)boundService);
            Log.d( getClass().getSimpleName(), "onServiceConnected()" );
      }

      public void onServiceDisconnected(ComponentName className) {
            remoteService = null;
        updateServiceStatus();
        Log.d( getClass().getSimpleName(), "onServiceDisconnected" );
      }
};


The Context.BIND_AUTO_CREATE ensures that a service is created if one did not exist although the onstart() will be called only on explicit start of the service.
Once the client is bound to the service and the service has already started, we can invoke any of the methods that are exposed by the service. Here we have only one method and that is getCounter(). In this example, the invocation is done by clicking the invoke button. That would update the counter text that is below the button. Let us see the invoke method:

Code: 
private void invokeService() {
     if(conn == null) {
        Toast.makeText(RemoteServiceClient.this, "Cannot invoke - service not bound", Toast.LENGTH_SHORT).show();
     } else {
        try {
           int counter = remoteService.getCounter();
           TextView t = (TextView)findViewById(R.id.notApplicable);
           t.setText( "Counter value: "+Integer.toString( counter ) );
           Log.d( getClass().getSimpleName(), "invokeService()" );
        } catch (RemoteException re) {
           Log.e( getClass().getSimpleName(), "RemoteException" );
        }
     }
}   


Once we use the service methods, we can release the service. This is done as follows (by clicking the release button):
Code: 
private void releaseService() {
   if(conn != null) {
           unbindService(conn);
           conn = null;
           updateServiceStatus();
           Log.d( getClass().getSimpleName(), "releaseService()" );
      } else {
          Toast.makeText(RemoteServiceClient.this, "Cannot unbind - service not bound", Toast.LENGTH_SHORT).show();
      }
}


Finally we can stop the service by clicking the stop button. After this point no client can invoke this service.

Code:
private void stopService() {
       if (!started) {
          Toast.makeText(RemoteServiceClient.this, "Service not yet started", Toast.LENGTH_SHORT).show();
      } else {
          Intent i = new Intent();
          i.setClassName("com.collabera.labs.sai", "com.collabera.labs.sai.RemoteService");
          stopService(i);
          started = false;
          updateServiceStatus();
          Log.d( getClass().getSimpleName(), "stopService()" );
      }
}


These are the basics of working with a remote service on Android platform. All the best!

Friday, September 12, 2014

Threading concept in Android

Threading concept in Android 

Introduction

Multi-threading is defined as a feature through which we can run two or more concurrent threads of a process. In this a process, the common data is shared among all these threads also known as sub-processes exclusively. In android there are many ways through which multi-threading can be established in the application.
Objective:
  • Understanding the basic concept of multithreading.
  • Understanding of Handler class in android
  • Understanding of Runnable Interface.

Multi-Threading In Android:

Multi-Threading in Android is a unique feature through which more than one threads execute together without hindering the execution of other threads. Multi-Threading in Android is not different from conventional multi-Threading. A class can be thought of as a process having its method as it’s sub-processes or threads. All these methods can run concurrently by using feature of Multi-Threading. In android, multi-Threading can be achieved through the use of many in-built classes. Out of them, Handler class is most commonly used.

Handler class in Android:

Handler class come from the Package android.os.Handler package and is most commonly used for multi-threading in android. Handler class provide sending and receiving feature for messages between different threads and handle the thread execution which is associated with that instance of Handler class.
In android class, every thread is associated with an instance of Handler class and it allows the thread to run along with other threads and communicate with them through messages.

Instantiating Handler class:

There are following two ways in which Handler class is usually instantiated for supporting multi-threading:
  • Through default constructor.
    Handler handlerObject = new Handler();
  • Through Parameterized constructor
    Handler handleObject = new Handler(Runnable runnableObject, Handler.Callback callbackObject);
Methods of Handler class for Multi-Threading:


Public final Boolean post(Runnable runnableObject){ return booleanValue; }


This Method attach a runnable instance with it’s associated thread and the body of that runnable instance will execute every time the thread gets executed.


Public final Boolean postAtTime((Runnable runnableObject, long timeinMillisecondObject){ return booleanValue; }


This Method attach a runnable instance with it’s associated thread and the body of that runnable instance will execute every time the thread gets executed at a time specified by the second argument.


Public final Boolean postDelayed((Runnable runnableObject, long timeinMillisecondObject){ return booleanValue; }


This Method attach a runnable instance with its associated thread and the body of that runnable instance will execute every time the thread gets executed after a time specified by the second argument.


Runnable Interface:

Runnable interface is used in multi-threading to be called in a loop when the thread starts. It is a type of thread that executes the statement in its body or calls other methods for a specified or infinite number of times.
This runable interface is used by the Handler class to execute the multi-threading, i.e., to execute one or more thread in specified time.
Runnable is an interface which is implemented by the class desired to support multithreading and that class must implements it’s abstract method public void run().
Run() method is the core of multithreading as it includes the statement or calls to other methods that the thread needs to be made for multithreading.
class ClassName implements Runnable
{
 @override
Public void run()
{
  Body of method
}
}
Runnable interface can also be used by using adapter class as explained below:
Runnable runnableObject =new Runnable()
{
@override
Public void run()
{
};
}
Steps Involved in making project on Multi-Threading:
Step 1: Make a new android project MultiThreading in Eclipse and create a package named com.nkm.thread in it.
Note: name of project, package and files can be given according to the user choice. But make modification accordingly to remove errors, if any.

Step 2:

Listing 1: Create an XML file main.xml if not already created in layout folder and paste the following code:
<?xml version="1.0" encoding="utf-8"?>
<RelativeLayout xmlns:android="http://schemas.android.com/apk/res/android"
    android:layout_width="fill_parent"
    android:layout_height="fill_parent" 
    >

    <RelativeLayout
        android:id="@+id/firstlayout"
        android:layout_width="fill.parent"
        android:layout_height="wrap.content"
        android:gravity="center" 
        android:layout_marginTop="80dp">

        <TextView
            android:id="@+id/display"
            android:layout_width="wrap.content"
            android:layout_height="wrap.content"
            android:text="Button will appear after 10 seconds" />
    </RelativeLayout>

    <RelativeLayout
        android:id="@+id/secondlayout"
        android:layout_width="fill_parent"
        android:layout_height="wrap_content"
        android:layout_below="@+id/firstlayout" 
        android:gravity="center">

        <TextView
            android:id="@+id/timer"
            android:layout_width="wrap.content"
            android:layout_height="wrap.content"
            android:gravity="center.horizontal"
            android:text="12" 
            android:layout_marginTop="80dp"
            android:textSize="36dp"/>
    </RelativeLayout>

    <RelativeLayout
        android:id="@+id/thirdlayout"
        android:layout_width="fill.parent"
        android:layout_height="wrap.content"
        android:layout_below="@+id/secondlayout" 
        android:gravity="center">

        <Button
            android:id="@+id/clickme"
            android:layout_width="wrap.content"
            android:layout_height="wrap.content"
            android:text="Click_me" 
            android:visibility="false"
            android:layout_marginTop="100dp"/>
    </RelativeLayout>

</RelativeLayout>

Explanation:

All the code is self explainable apart from visibility attribute used in <Button /> tag.
This attribute defines the visibility of that component. It is invisible at start as it’s value is invisible.

Step 3:

Listing 2: Make a Java file named MultiThreadingActivity if not already created in com.nkm.thread package and paste the following code:
package com.nkm.thread;

import android.app.Activity;
import android.os.Bundle;
import android.os.Handler;
import android.widget.Button;
import android.widget.TextView;

public class MultiThreadingActivity extends Activity {
 Handler hand = new Handler();
 Button clickme;
 TextView timer;

 @Override
 public void onCreate(Bundle_savedInstance) {
  super.onCreate(savedInstanceState);
  setContentView(R.layout.main);
  timer = (TextView) findViewById(R.id_timer);
  clickme = (Button) findViewById(R.id_clickme);
  hand.postDelayed(run, 1000);
 }

 Runnable run = new Runnable() {
  @Override
  public void run() {
   updateTime();

  }
 };

 public void updateTime() {
        timer.setText("" + (Integer.parseInt(timer.getText().toString()) - 1));
  if (Integer.parseInt(timer.getText().toString()) == 0) {
   clickme.setVisibility(0);
  } else {
   hand.postDelayed(run, 1000);
  }
 }
}

Explanation:

The above code will create an activity which displays the button when the timer reaches 0 and the timer decrease by 1 every second.
Handler class object :
Handler hand = new Handler();
This will create an object named hand of Handler class which is to be used for Multithreading.
Listing 3: postDelayed() method :
hand.postDelayed(run, 1000);
This line will call the run method of Runnable interface instance with reference run after 1000 milliseconds for the very 1st time.
Listing 4: updateTime() method :
public void updateTime() {
 timer.setText("" + (Integer.parseInt(timer.getText().toString()) - 1));
  if (Integer.parseInt(timer.getText().toString()) == 0) {
   clickme.setVisibility(0);
  } else {
   hand.postDelayed(run, 1000);
  }
 }

This is the updateTime method which includes if-else statement which will decrease the timer text by 1 if the timer is not 0.The timer is reduced by 1 every 1000 milliseconds as handler post delayed the call to run method by 1000 milliseconds in second argument.
Else it will display the click me button as the timer is 0.
Listing 5: Runnable class object :
Runnable run = new Runnable() {
  @Override
  public void run() {
   updateTime();

  }
 };
This is runnable method instantiated with adapter class methodology. The user defined method UpdateTime() is called in the run method of Runnable interface.
So, on the whole it creates a thread that executes in a loop until certain condition met.

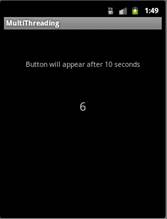
Figure 1: Output 1
Output 2
Figure 2: Output 2
Output 3
Figure 3: Output 3

Tuesday, July 29, 2014

Android JSON Parser Example


JSON stands for JavaScript Object Notation.It is an independent data exchange format and is the best alternative for XML. This chapter explains how to parse the JSON file and extract necessary information from it.
Android provides four differnet classes to manipulate JSON data. These classes are JSONArray,JSONObject,JSONStringer and JSONTokenizer.
The first step is to identify the fields in the JSON data in which you are interested in. For example. In the JSON given below we interested in getting temperature only.

Example:


{
"sys":
   {
      "country":"GB",
      "sunrise":1381107633,
      "sunset":1381149604
   },
"weather":[
   {
      "id":711,
      "main":"Smoke",
      "description":"smoke",
      "icon":"50n"
   }
],
"main":
   {
      "temp":304.15,
      "pressure":1009,
   }
}


Following is the content of the modifed main activity file src/com.example.jsonparser/MainActivity.java.


package com.example.jsonparser; 
 import android.os.Bundle;
  import android.app.Activity; 
 import android.view.Menu; 
 import android.view.View; 
 import android.widget.EditText; 

 public class MainActivity extends Activity { 
 private String url1 = "http://api.openweathermap.org/data/2.5/weather?q="; 
 private EditText location,country,temperature,humidity,pressure; 
 private HandleJSON obj;  
@Override 
 protected void onCreate(Bundle savedInstanceState) 
 { super.onCreate(savedInstanceState); 
 setContentView(R.layout.activity_main); 
 location = (EditText)findViewById(R.id.editText1); 
 country = (EditText)findViewById(R.id.editText2); 
 temperature = (EditText)findViewById(R.id.editText3); 
 humidity = (EditText)findViewById(R.id.editText4); 
 pressure = (EditText)findViewById(R.id.editText5); 
 } 
 @Override 
 public boolean onCreateOptionsMenu(Menu menu) 
 { // Inflate the menu; this adds items 
  //to the action bar if it is

 present. getMenuInflater().inflate(R.menu.main, menu); 
 return true;  
}
  public void open(View view)
{  
String url = location.getText().toString();
  String finalUrl = url1 + url; 
country.setText(finalUrl); 
obj = new HandleJSON(finalUrl); 
obj.fetchJSON(); 
 while(obj.parsingComplete); 
 country.setText(obj.getCountry()); 
 temperature.setText(obj.getTemperature()); 
 humidity.setText(obj.getHumidity()); 
 pressure.setText(obj.getPressure()); } }


Following is the content of src/com.example.jsonparser/HandleXML.java.

package com.example.jsonparser; 
 import java.io.IOException; 
 import java.io.InputStream; 
 import java.io.InputStreamReader; 
 import java.io.StringWriter;
  import java.io.UnsupportedEncodingException; 
 import java.net.HttpURLConnection; import java.net.URL;
import java.util.ArrayList; 
 import java.util.List; 
 import java.util.Map; 
 import org.json.JSONObject; 
 import org.xmlpull.v1.XmlPullParser; 
 import org.xmlpull.v1.XmlPullParserFactory;
import android.annotation.SuppressLint; 

 public class HandleJSON  
{  
private String country = "county"; 
 private String temperature = "temperature"; 
 private String humidity = "humidity"; 
 private String pressure = "pressure"; 
 private String urlString = null; 
 public volatile boolean parsingComplete = true; 
 public HandleJSON(String url)
{ 
 this.urlString = url; 
 } 
 public String getCountry()
{ 
 return country; 
 }  
public String getTemperature()
{ return temperature;
  } 
 public String getHumidity()
{  
return humidity; 
 } 
 public String getPressure()
{ 
 return pressure;
  } 
 @SuppressLint("NewApi")
  public void readAndParseJSON(String in) 
 { 
 try 
 {  
JSONObject reader = new JSONObject(in); 
 JSONObject sys = reader.getJSONObject("sys"); 
 country = sys.getString("country"); 
 JSONObject main = reader.getJSONObject("main"); 
 temperature = main.getString("temp");
  pressure = main.getString("pressure"); 
 humidity = main.getString("humidity"); 
 parsingComplete = false;  
}  
catch (Exception e) 
 { 
 // TODO Auto-generated catch block 
e.printStackTrace();  
}  
} 
 public void fetchJSON()
{  
Thread thread = new Thread(new Runnable()
{  
@Override  
public void run()  
{  
try  
{ 
 URL url = new URL(urlString); 
 HttpURLConnection conn = (HttpURLConnection) url.openConnection(); 
 conn.setReadTimeout(10000 /* milliseconds */); 
 conn.setConnectTimeout(15000 /* milliseconds */); 
 conn.setRequestMethod("GET"); 
 conn.setDoInput(true); 
 // Starts the query conn.connect();  
InputStream stream = conn.getInputStream(); 
 String data = convertStreamToString(stream); 
 readAndParseJSON(data); 
stream.close();  
}  
catch (Exception e)  
{ 
e.printStackTrace(); 
 } 
 } 
 }); 

thread.start();  
}  
static String convertStreamToString(java.io.InputStream is) 
 { 
 java.util.Scanner s = new java.util.Scanner(is).useDelimiter("\\A");
  return  s.hasNext() ? s.next() : ""; 
 } }


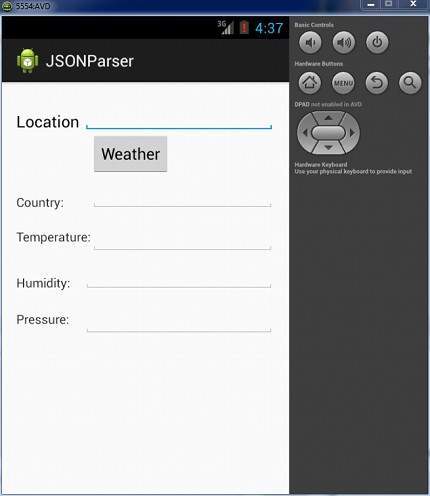
Following is the modified content of the xml res/layout/activity_main.xml.


<RelativeLayout 
 xmlns:android="http://schemas.android.com/apk/res/android"
   xmlns:tools="http://schemas.android.com/tools"
   android:layout_width="match_parent"
   android:layout_height="match_parent"
   android:paddingBottom="@dimen/activity_vertical_margin"
   android:paddingLeft="@dimen/activity_horizontal_margin"
   android:paddingRight="@dimen/activity_horizontal_margin"
   android:paddingTop="@dimen/activity_vertical_margin"
   tools:context=".MainActivity" >
 
 <TextView
      android:id="@+id/textView1"
      android:layout_width="wrap_content"
      android:layout_height="wrap_content"
      android:layout_alignParentLeft="true"
      android:layout_alignParentTop="true"
      android:layout_marginTop="15dp"
      android:text="@string/location"
      android:textAppearance="?android:attr/textAppearanceMedium" />
 
 <EditText
      android:id="@+id/editText1"
      android:layout_width="wrap_content"
      android:layout_height="wrap_content"
      android:layout_alignBottom="@+id/textView1"
      android:layout_alignParentRight="true"
      android:ems="10" />
 
 <TextView
      android:id="@+id/textView2"
      android:layout_width="wrap_content"
      android:layout_height="wrap_content"
      android:layout_alignLeft="@+id/textView1"
      android:layout_below="@+id/textView1"
      android:layout_marginTop="68dp"
      android:text="@string/country"
      android:textAppearance="?android:attr/textAppearanceSmall" />
 
<TextView
      android:id="@+id/textView3"
      android:layout_width="wrap_content"
      android:layout_height="wrap_content"
      android:layout_below="@+id/textView2"
      android:layout_marginTop="19dp"
      android:text="@string/temperature"
      android:textAppearance="?android:attr/textAppearanceSmall" /> 
 
 <TextView
      android:id="@+id/textView4"
      android:layout_width="wrap_content"
      android:layout_height="wrap_content"
      android:layout_alignLeft="@+id/textView3"
      android:layout_below="@+id/textView3"
      android:layout_marginTop="32dp"
      android:text="@string/humidity"
      android:textAppearance="?android:attr/textAppearanceSmall" /> 
 
 
<TextView
      android:id="@+id/textView5"
      android:layout_width="wrap_content"
      android:layout_height="wrap_content"
      android:layout_alignLeft="@+id/textView4"
      android:layout_below="@+id/textView4"
      android:layout_marginTop="21dp"
      android:text="@string/pressure"
      android:textAppearance="?android:attr/textAppearanceSmall" />

   <EditText
      android:id="@+id/editText2"
      android:layout_width="wrap_content"
      android:layout_height="wrap_content"
      android:layout_above="@+id/textView3"
      android:layout_toRightOf="@+id/textView3"
      android:ems="10" >

      <requestFocus />
   </EditText>  


 <EditText
      android:id="@+id/editText3"
      android:layout_width="wrap_content"
      android:layout_height="wrap_content"
      android:layout_alignBaseline="@+id/textView3"
      android:layout_alignBottom="@+id/textView3"
      android:layout_alignLeft="@+id/editText2"
      android:ems="10" />

   <EditText
      android:id="@+id/editText4"
      android:layout_width="wrap_content"
      android:layout_height="wrap_content"
      android:layout_above="@+id/textView5"
      android:layout_alignLeft="@+id/editText1"
      android:ems="10" />

   <EditText
      android:id="@+id/editText5"
      android:layout_width="wrap_content"
      android:layout_height="wrap_content"
      android:layout_alignBaseline="@+id/textView5"
      android:layout_alignBottom="@+id/textView5"
      android:layout_alignRight="@+id/editText4"
      android:ems="10" />

   <Button
      android:id="@+id/button1"
      android:layout_width="wrap_content"
      android:layout_height="wrap_content"
      android:layout_alignLeft="@+id/editText2"
      android:layout_below="@+id/editText1"
      android:onClick="open"
      android:text="@string/weather" />

</RelativeLayout>


Following is the content of the res/values/string.xml.
 
 
<?xml version="1.0" encoding="utf-8"?>
<resources>
   <string name="app_name">JSONParser</string>
   <string name="action_settings">Settings</string>
   <string name="hello_world">Hello world!</string>
   <string name="location">Location</string>
   <string name="country">Country:</string>
   <string name="temperature">Temperature:</string>
   <string name="humidity">Humidity:</string>
   <string name="pressure">Pressure:</string>
   <string name="weather">Weather</string>
</resources>


Following is the content of AndroidManifest.xml file.


<?xml version="1.0" encoding="utf-8"?>
<manifest xmlns:android="http://schemas.android.com/apk/res/android"
   package="com.example.jsonparser"
   android:versionCode="1"
   android:versionName="1.0" >

   <uses-sdk
      android:minSdkVersion="8"
      android:targetSdkVersion="17" />
   <uses-permission android:name="android.permission.INTERNET"/>

   <application
      android:allowBackup="true"
      android:icon="@drawable/ic_launcher"
      android:label="@string/app_name"
      android:theme="@style/AppTheme" >
   <activity
      android:name="com.example.jsonparser.MainActivity"
      android:label="@string/app_name" >
      <intent-filter>
         <action android:name="android.intent.action.MAIN" />

         <category android:name="android.intent.category.LAUNCHER" />
      </intent-filter>
   </activity>
</application>
</manifest>
 
 
Anroid XML Parser Tutorial